How to Fold the Hercules Stand So It Fits in the Box Again
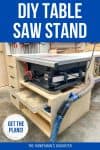
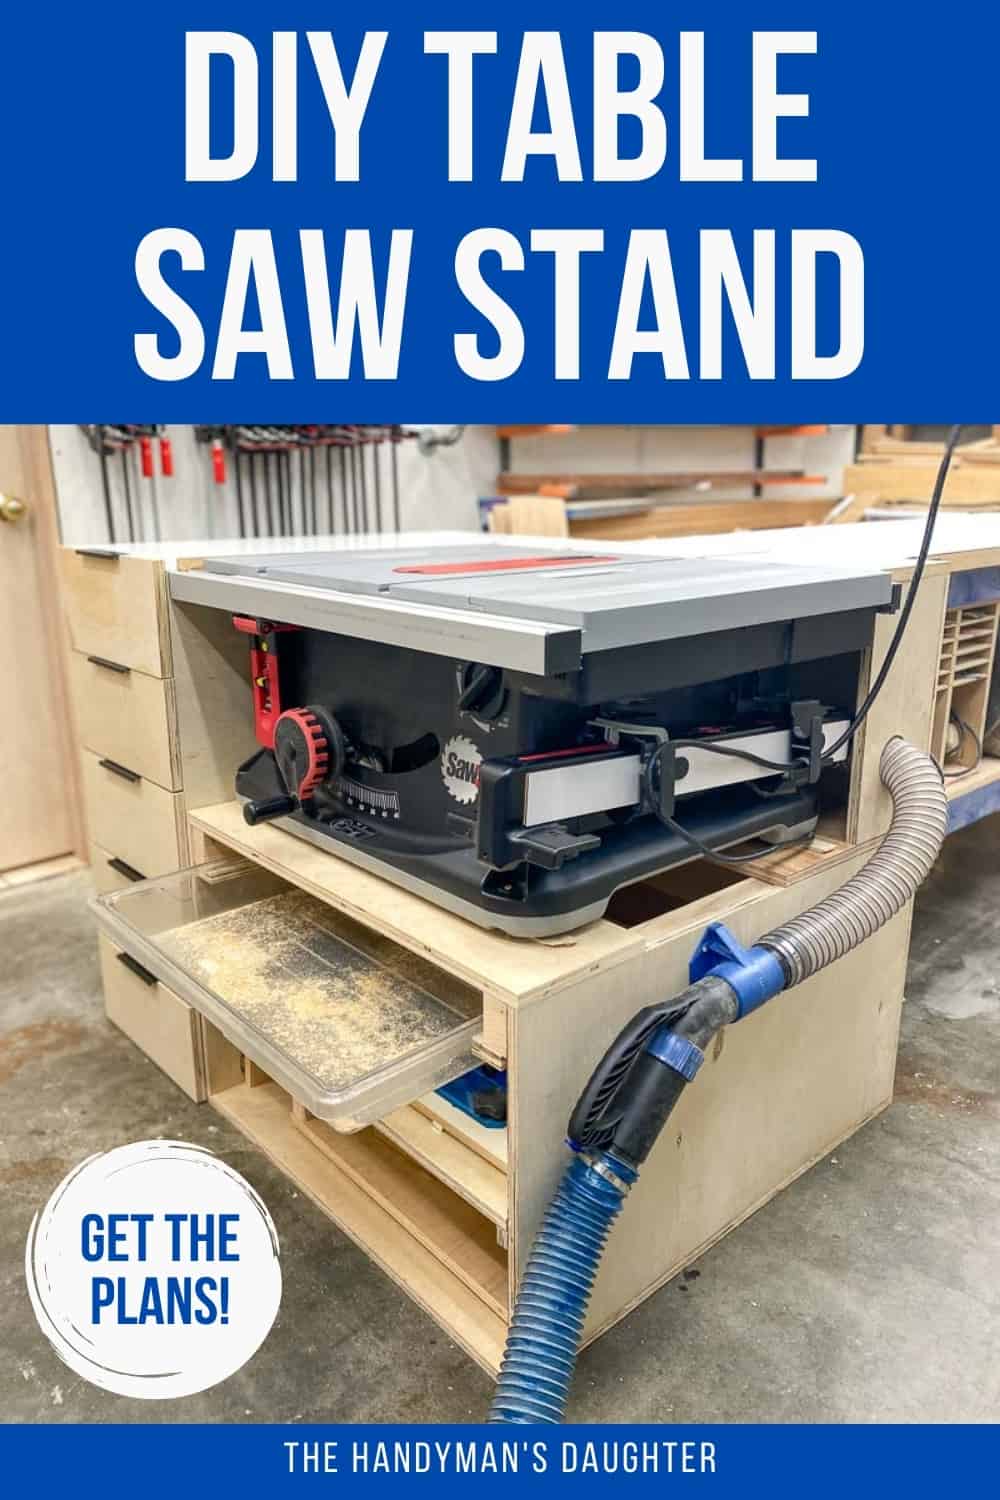
Add an outfeed table and tons of storage to your jobsite tabular array saw with this astonishing DIY table saw stand! Get the plans to build your own table saw workbench!
The tabular array saw is the eye of the workshop, and I utilise mine for almost every projection. Simply I just accept a small jobsite tabular array saw, which makes it difficult to cut wider sheets of plywood or apply some jigs and sleds properly.
This mail service contains chapter links for your convenience. Purchases made through these links may earn me a small commission at no boosted price to you. Please visit my disclosures page for more information.
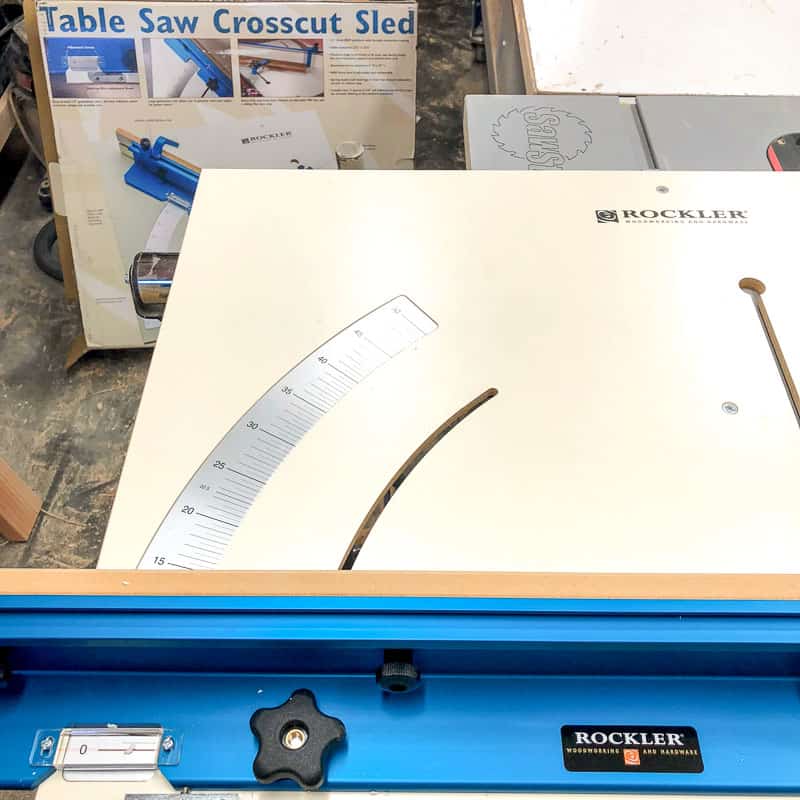
As you can see above, this crosscut sled needs a lot more surface surface area to the left of the blade. Half the base falls off the edge, and the roller stand I was using isn't actually ideal.
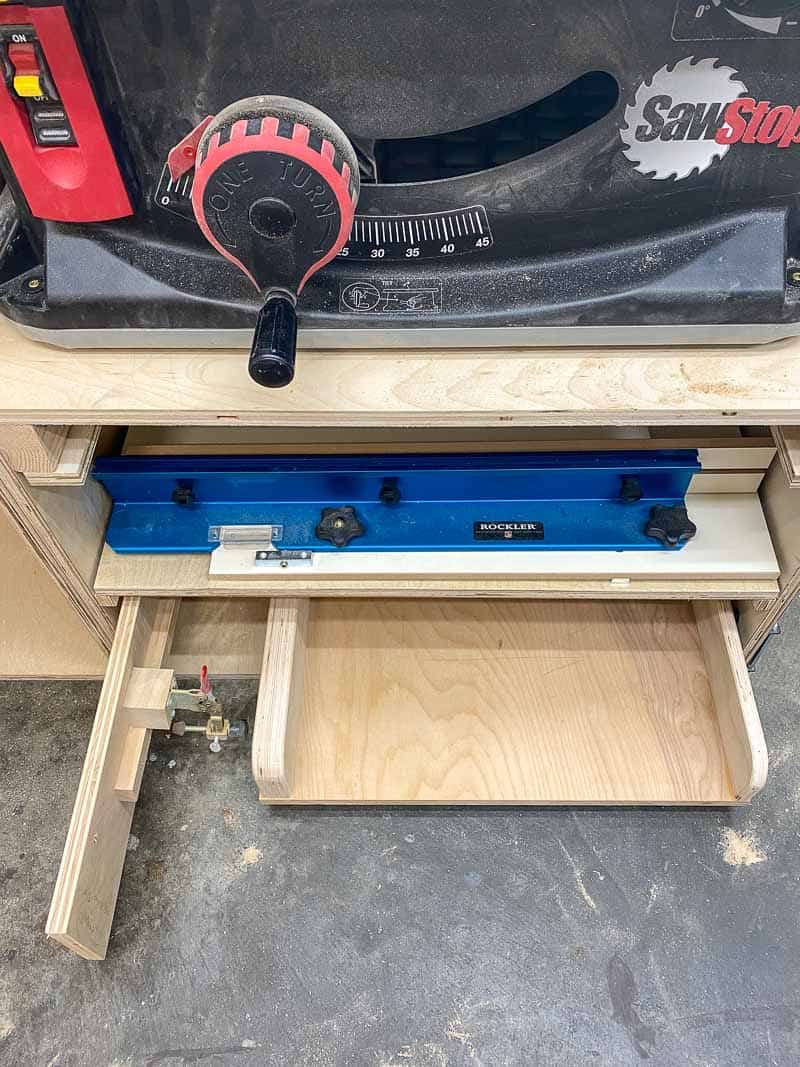
I designed this DIY table saw stand to fully back up the crosscut sled, and fabricated the elevation out of melamine so it can slide smoothly. Grooves in the outfeed table line up with the miter slots on the saw, and the stand is juuuust high enough to clear the pinnacle of my Kreg workbench backside it.
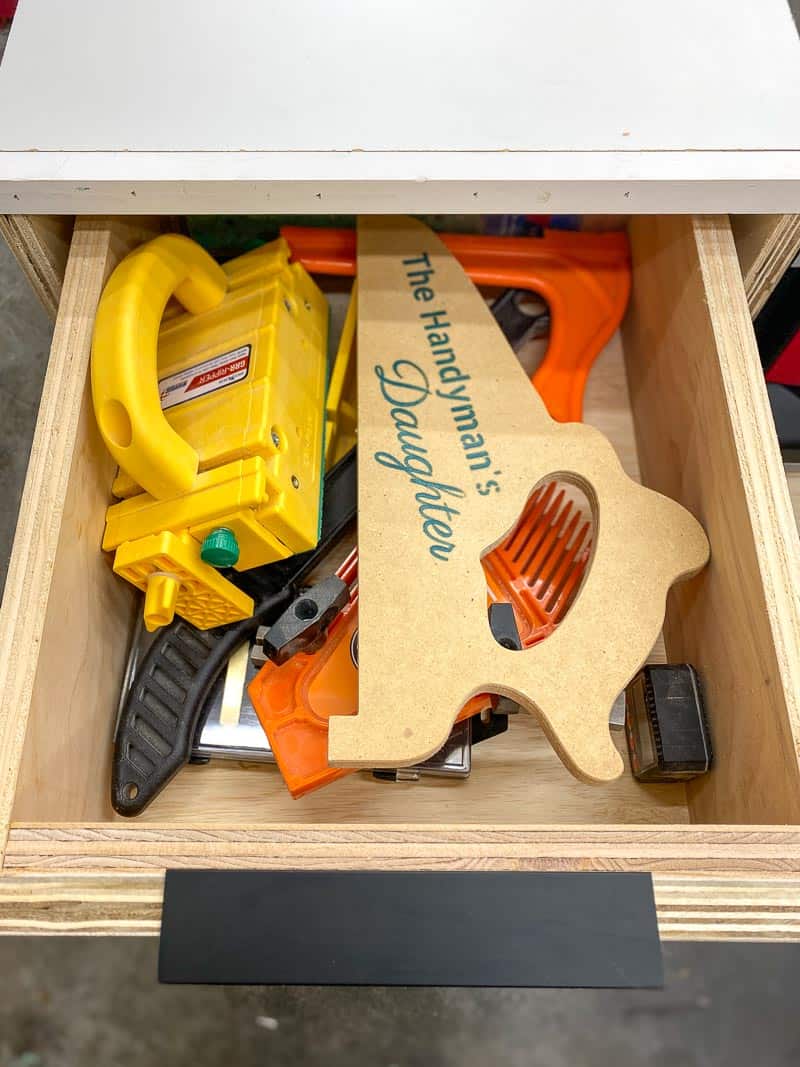
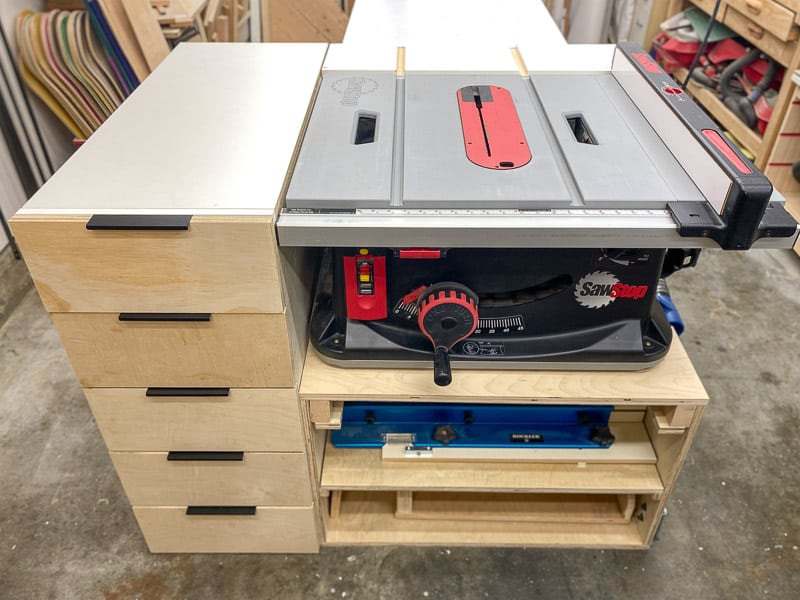
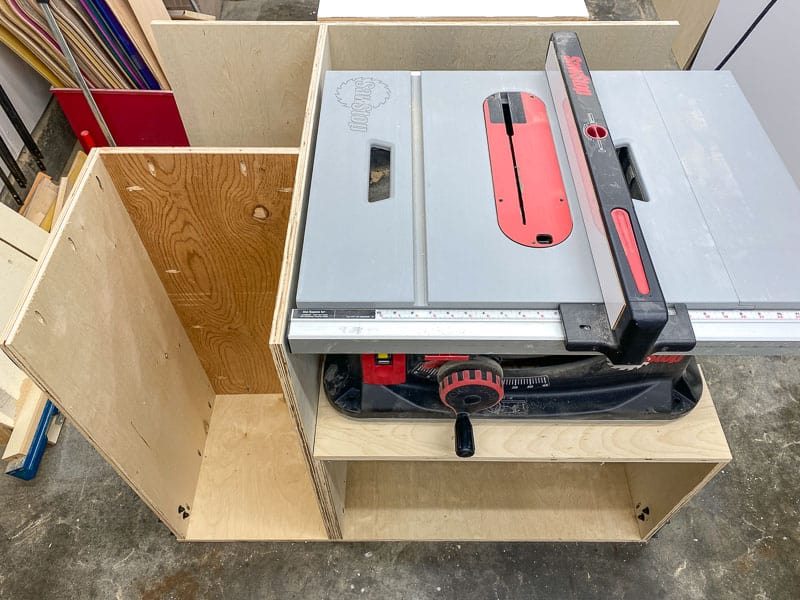
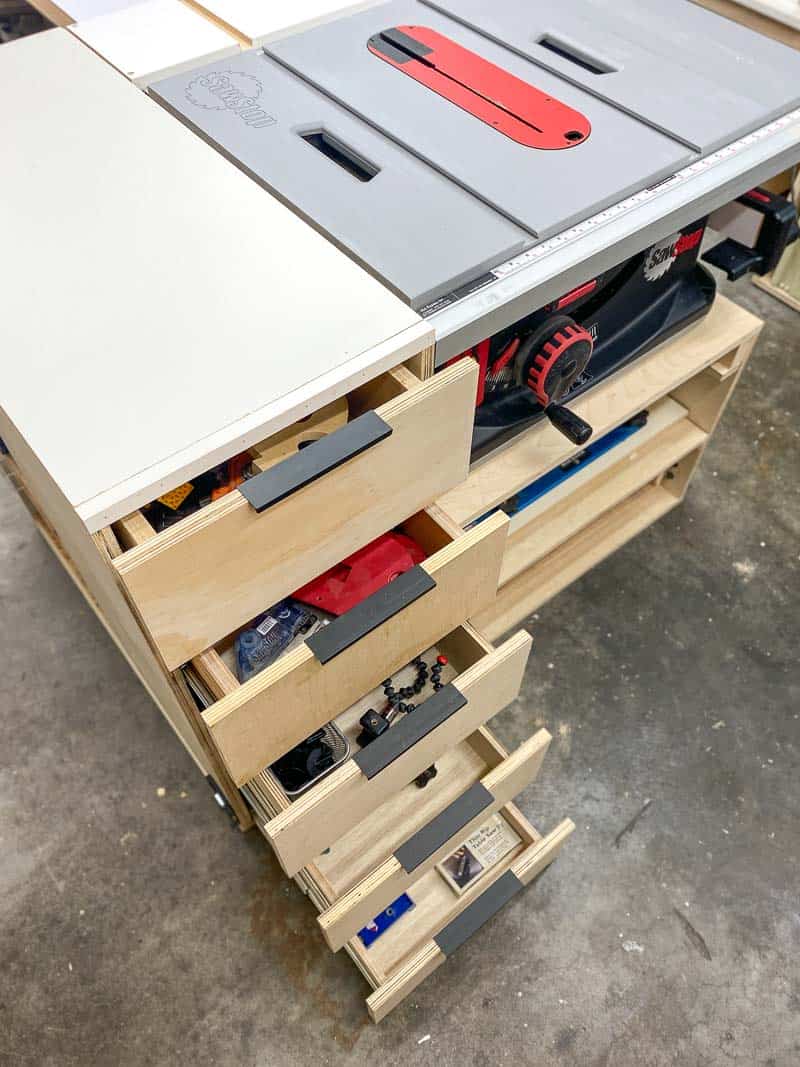
This small extension added a TON of storage space! I managed to squeeze five drawers and four shelves into the same footprint as the folding stand I had before. Now all the push sticks, featherboards and other table saw related gadgets are right where I demand them!
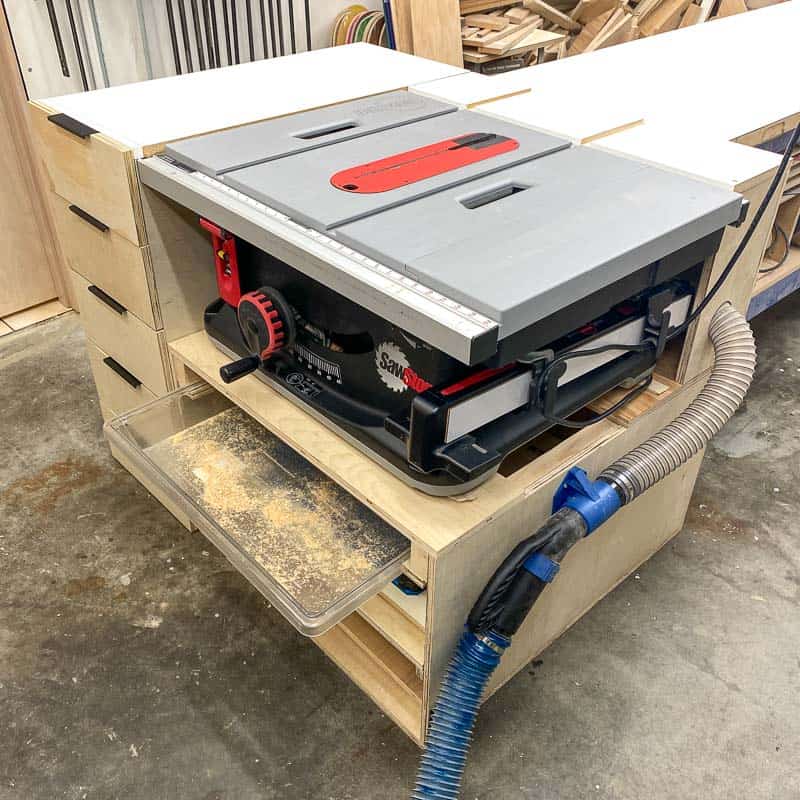
I've also improved the tabular array saw dust collection! There's a dust port attached to the side, so I can hook up my wall mountain dust collector hose easily. There'due south also a tray underneath to collect sawdust that falls through the bottom. I merely vacuum information technology out every once in a while, and then slide it back into place!
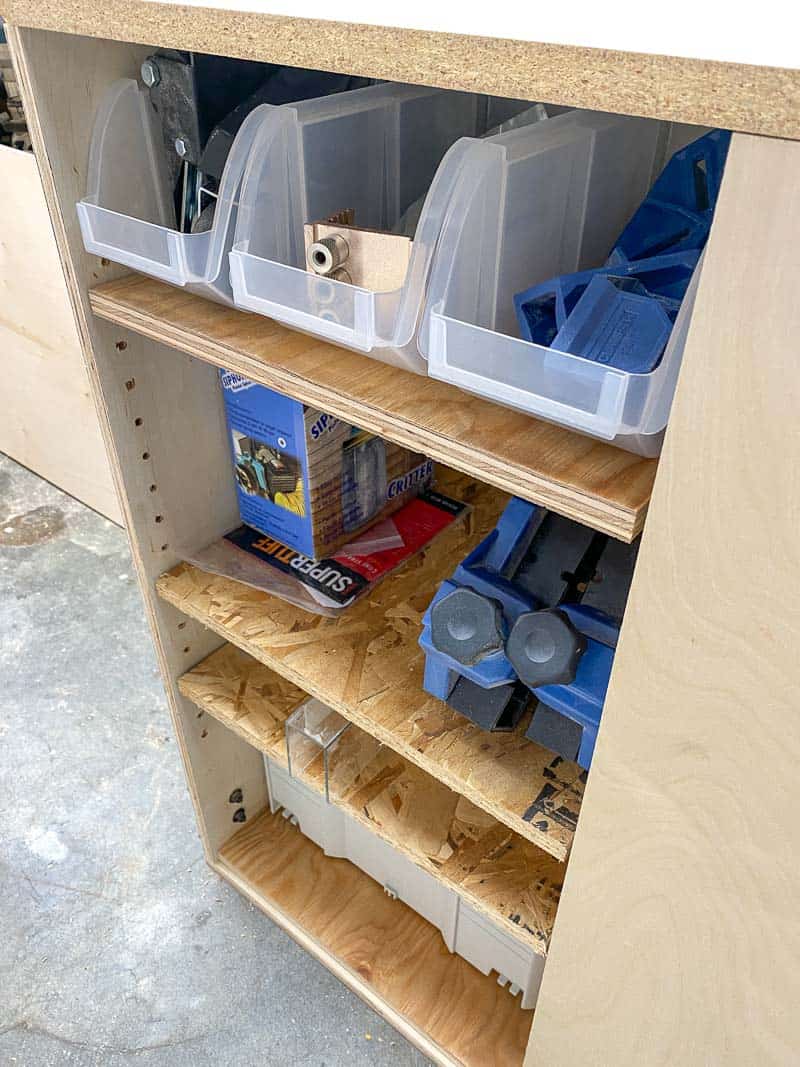
All my sleds and jigs are stored on shelves under the tray, instead of leaning up confronting the wall where they constantly brutal over.
Fix to build your own? Check out the video below for an overview, so continue reading for the tutorial.
Materials needed for DIY tabular array saw stand
- Ii sheets of ¾" plywood
- Half sail (48" x 48") of ¾" melamine
- You tin besides use ¾" plywood for the top, but melamine slides meliorate.
- One-half sheet (48" 10 48") of ½" plywood for drawer boxes
- One-half sheet (48" x 48") of ¼" plywood for drawer bottoms
- Pocket hole jig
- 1 ¼" pocket hole screws
- 3" pigsty saw
- Dust collection hose to fit your table saw dust port (at least 16" long)
- Large tray for collecting sawdust (dimensions are sized for this ane)
- Shelf pivot jig and pins (or use pocket holes for fixed shelves)
- Five pairs of 16" drawer slides
- Five drawer pulls
How to brand a table saw stand with storage
Download the plans
You can download the DIY table saw stand up plans by clicking the button beneath! The printable plans include a detailed cutting list and plywood cut diagram, step by step instructions with 3D models, and a handy checklist to go along you lot on track.

Measure out your tabular array saw
Information technology'due south crucial that the top of the saw and the peak of the outfeed tabular array are exactly the same height. Otherwise, boards volition grab on the college edge and potentially kick dorsum.
To measure the peak accurately, identify a board on top of the saw sticking out over the edge. Then measure the distance from the bottom of the board straight downwardly to the flooring. Then measure out from the top of the stand (where the saw anxiety rest) to the floor, and decrease it from the overall summit to get the verbal summit of the saw (ewwww, math!)
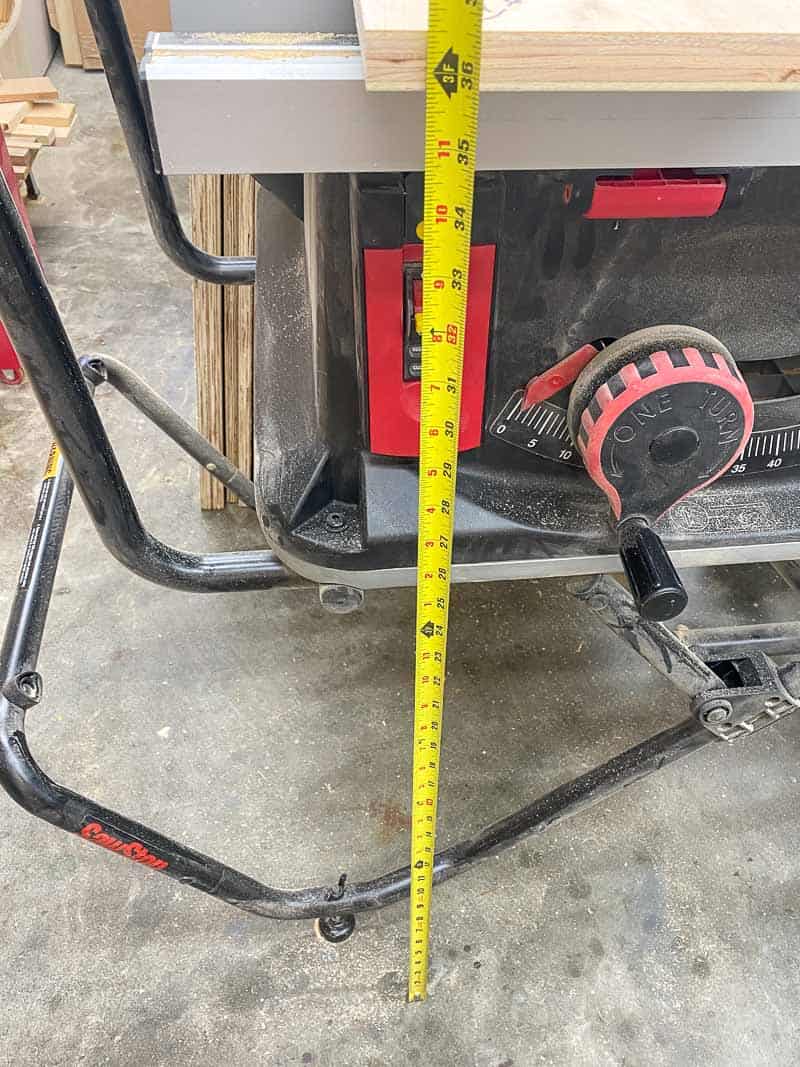
All the dimensions in the plans are for the SawStop Jobsite table saw (which is an amazing saw, by the way, and it won't chop off your fingers! 🙂 ) You'll need to adjust the size to fit your own saw according to your measurements.
Assemble the tabular array saw base of operations
Commonly I would recommend using forest gum in all the joints, merely non for this project. Yous won't know for sure if your measurements are correct until afterwards in the build, and y'all won't be able to take information technology apart to fix it if you use glue! Plus, I'll need to take the unabridged thing apart if we ever move, since my workshop is in the basement and it won't fit through the door.
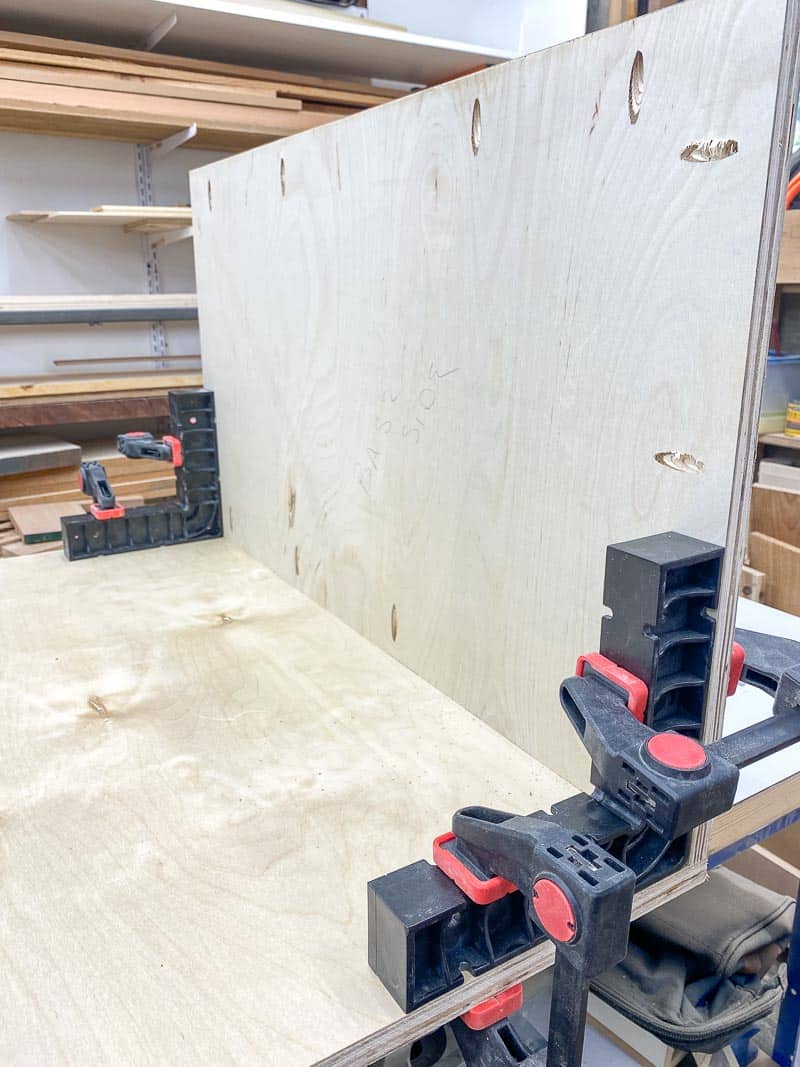
I used a track saw to cut the bigger pieces of plywood for the base, dorsum and eye panels, then drilled pocket holes equally indicated in the plans to bring together everything together.
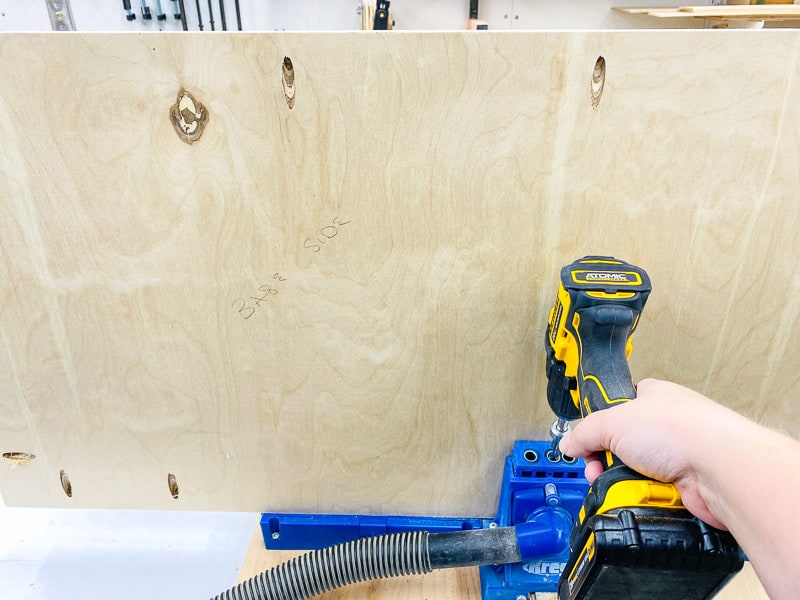
These bigger pieces tin can get a petty unwieldy, especially when you're working alone. Associates squares and a few clamps act as another set of hands to hold the parts at a perfect xc degree angle while you screw everything into identify!
I used up a lot of scrap plywood for this project, which is why yous'll run across various types throughout the build. I tried to hide the ugly ones whenever possible, similar this spot under the saw. The gap between the two boards will allow sawdust to fall through to the tray below.
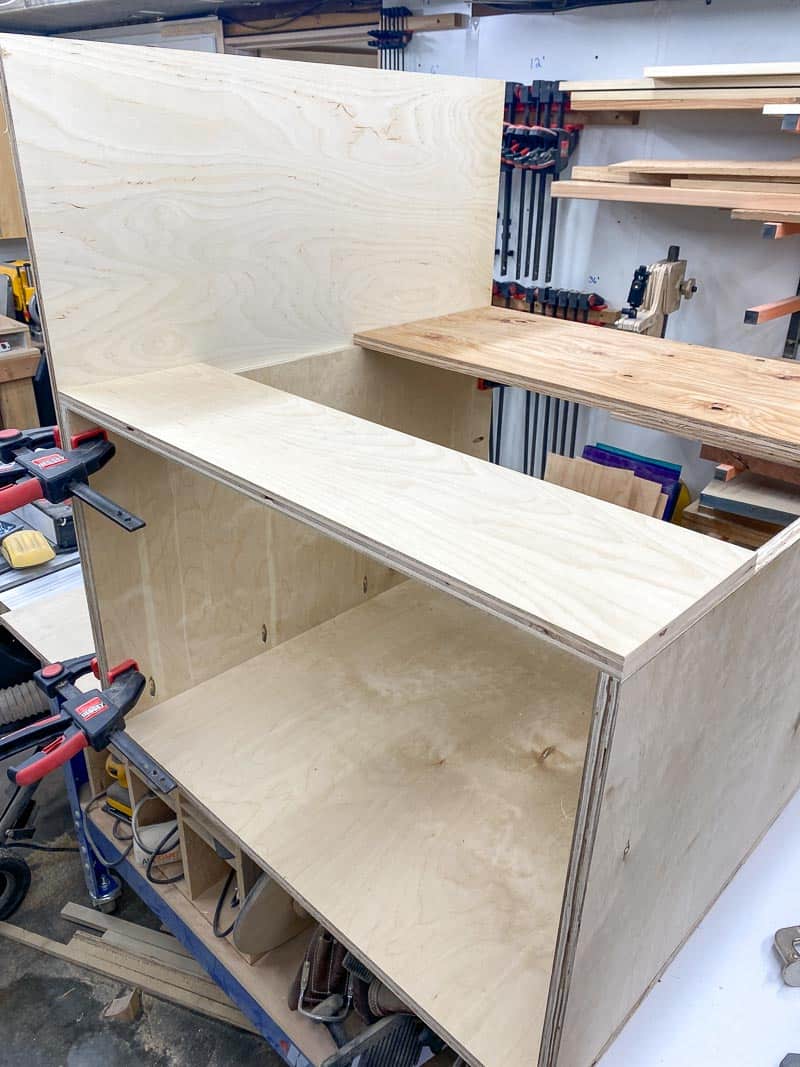
One time the base of operations is assembled, you can identify the saw on top and use it for the rest of the build!
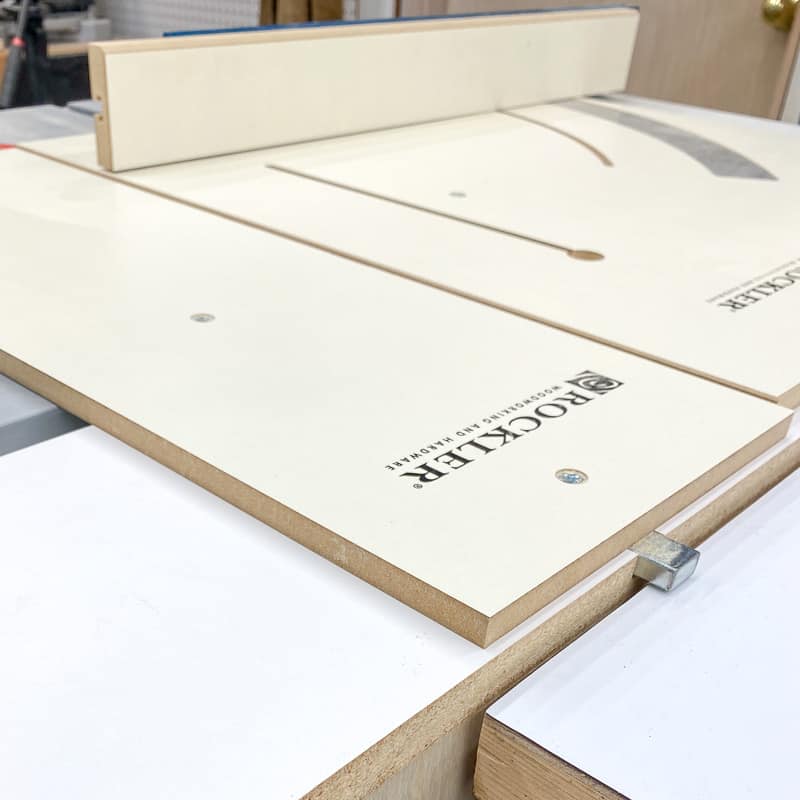
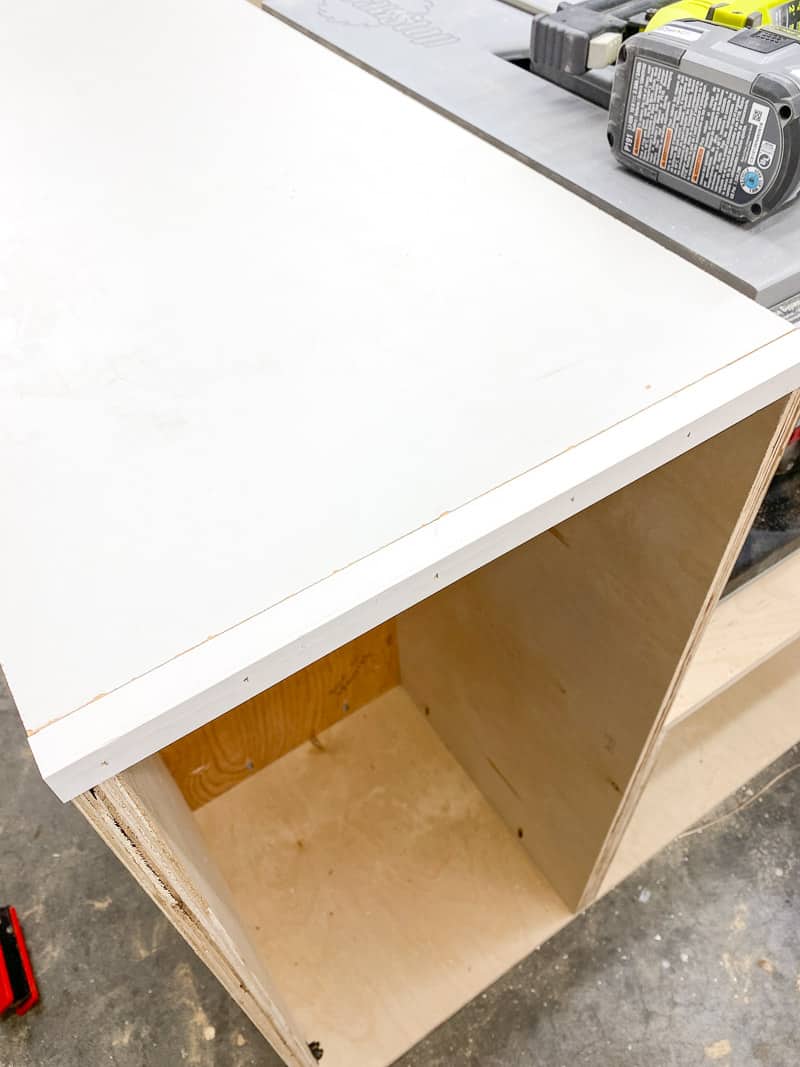
Install the top
The left side superlative and the back outfeed top are fabricated from two separate pieces of melamine, to make information technology easier to cutting the grooves. The scrap melamine I had for the left side was slightly also short, so I added a strip of preprimed trim to the stop to make up the departure.
The dorsum outfeed needed a fleck more than support, so I added end pieces to shut up the sides, and then drilled a three" hole for the dust drove hose.
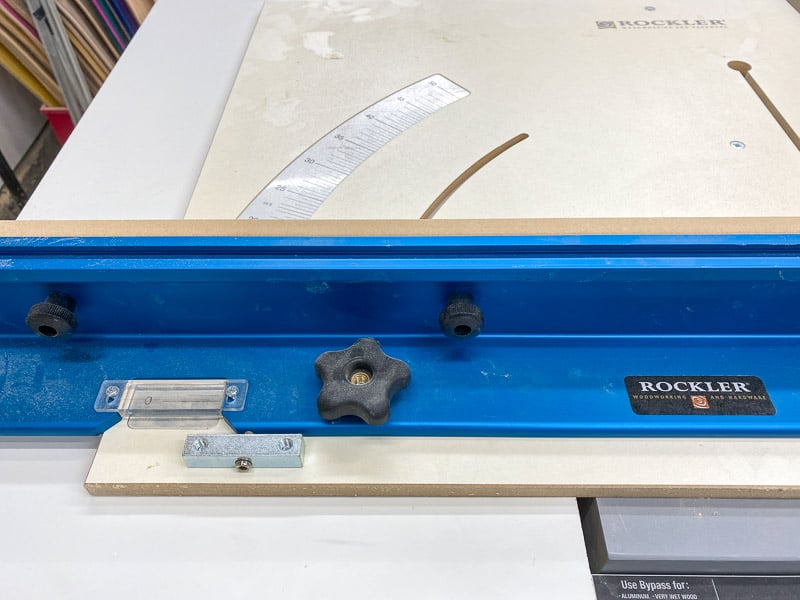
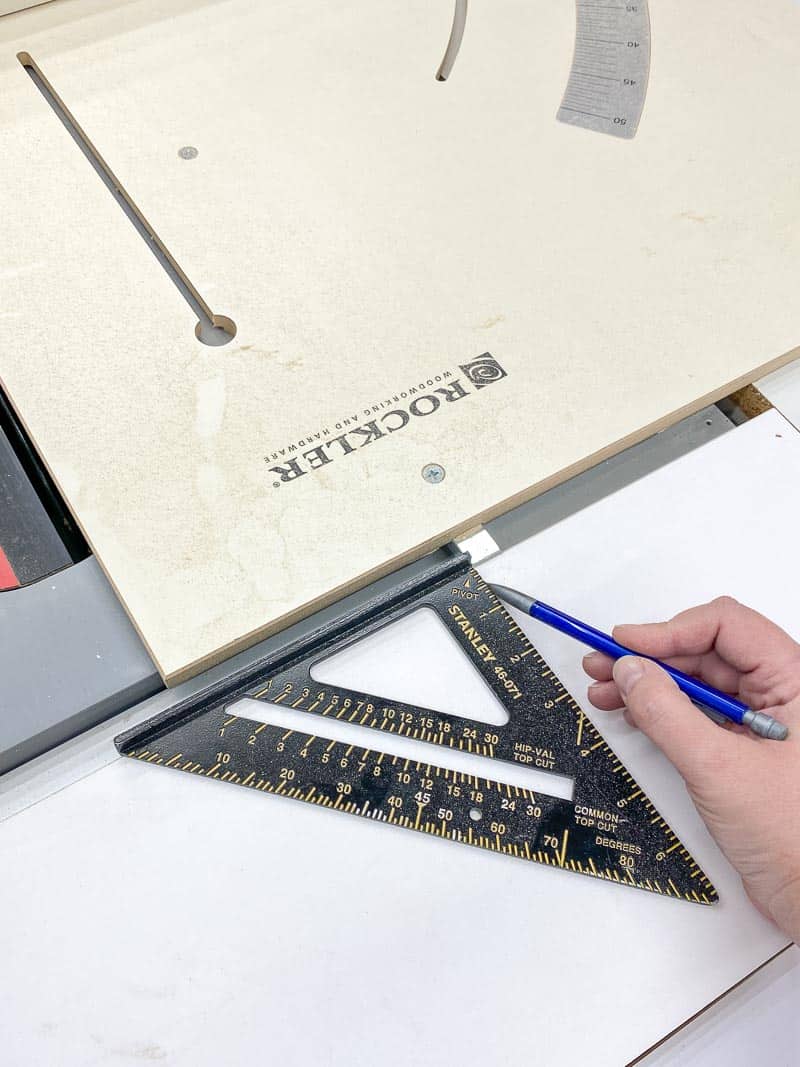
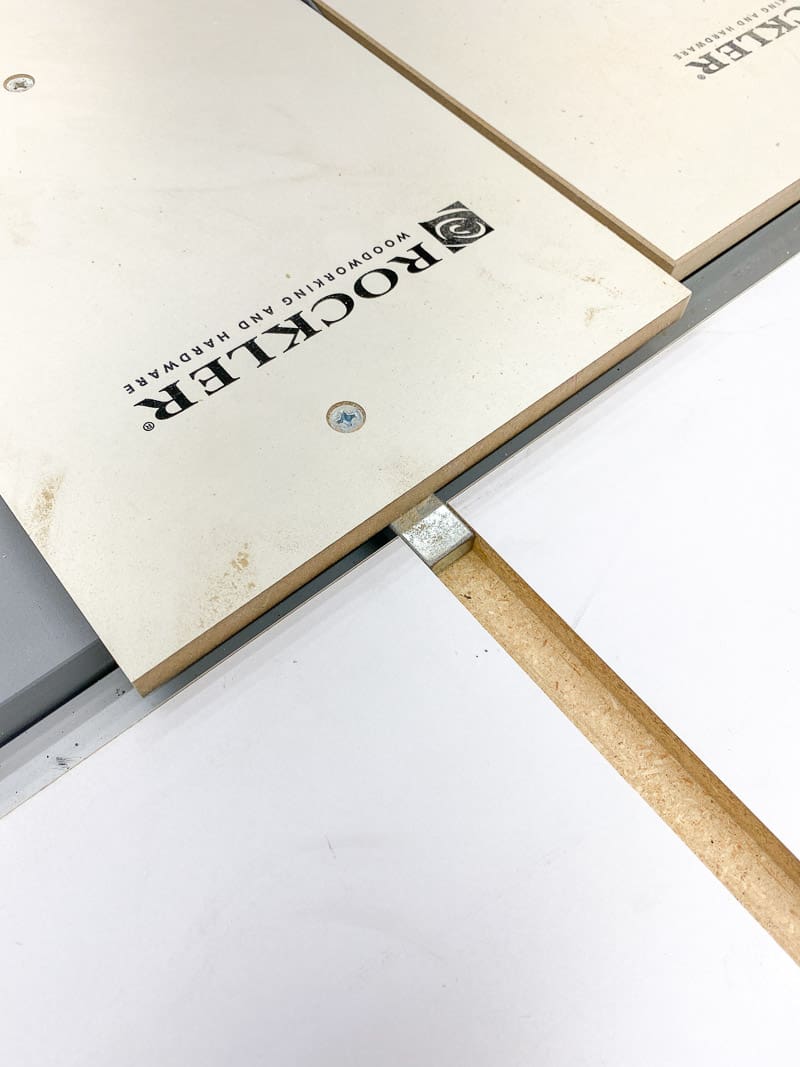
Mark the position of the miter slots onto the outfeed table piece. I used the runners of my crosscut sled to line them upwards perfectly, then cutting the grooves on the table saw. You could also utilise a router for this stride.
Make sure that the sled tin can move smoothly all the way through the groove. My workbench was already gear up to the correct meridian to clear the runners. Then attach the top to the base with pocket holes (from the outside) and countersink screws, so information technology's like shooting fish in a barrel to remove in case y'all need to access that space.
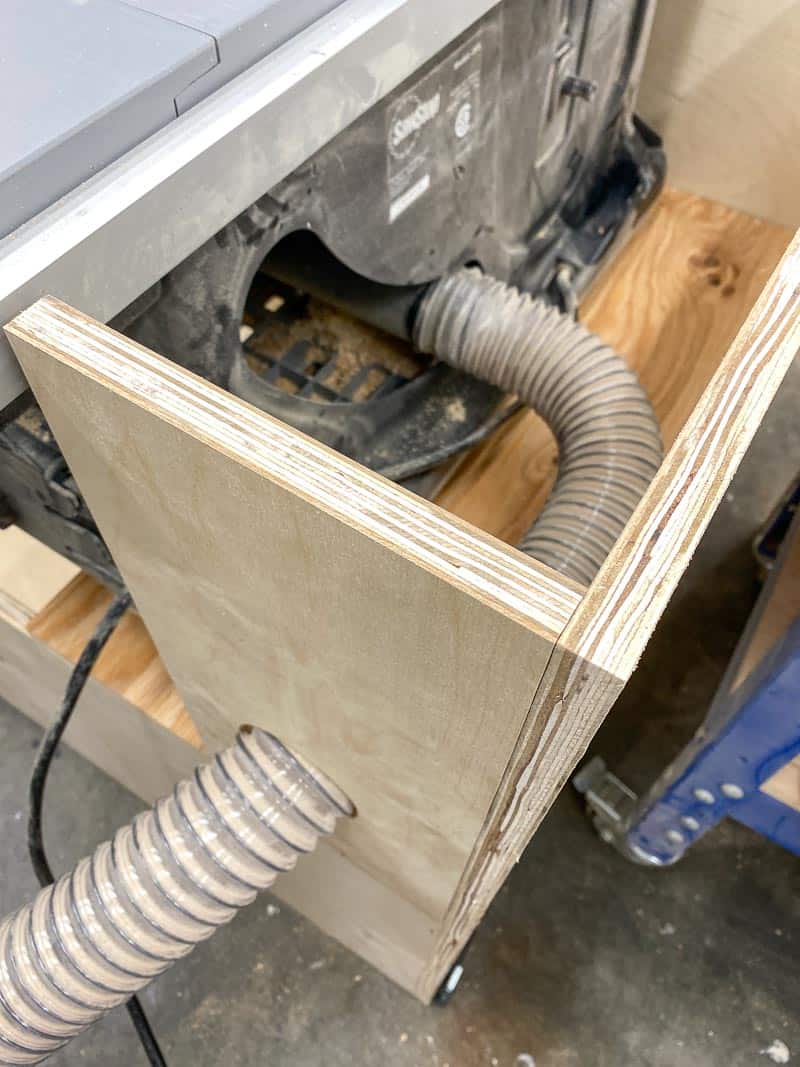
Add dust tray and shelf underneath the saw
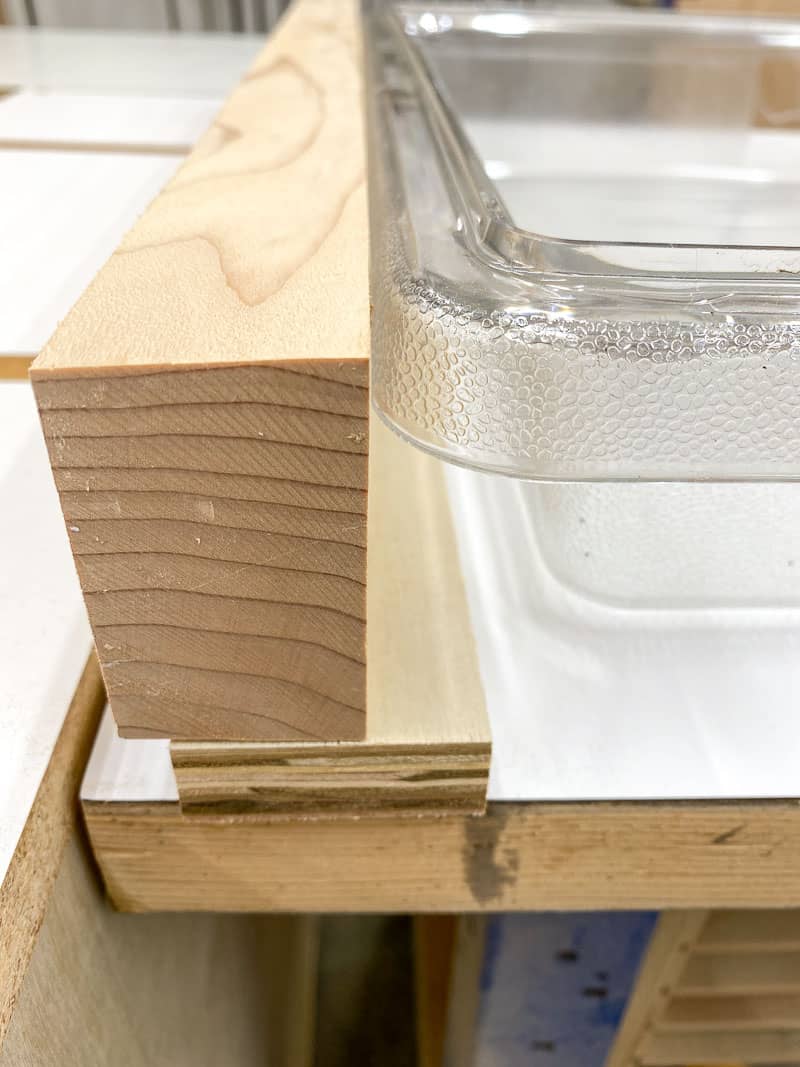
The dust tray is just a plastic food storage container that yous would normally observe in a commercial kitchen. Information technology's wide enough to span the entire underside of the table saw, but shallow and so I can have plenty space for two shelves underneath.
I created a bracket similar to the ones I used on my wall mount storage bins. Information technology's just a 2x4 with a scrap of plywood attached to the bottom. Adjust the width of the plywood lip so that it holds the tray on both sides.
I didn't want the tray to slide all the mode to the back, then I installed a stop that keeps it at the perfect spot for catching all that sawdust.
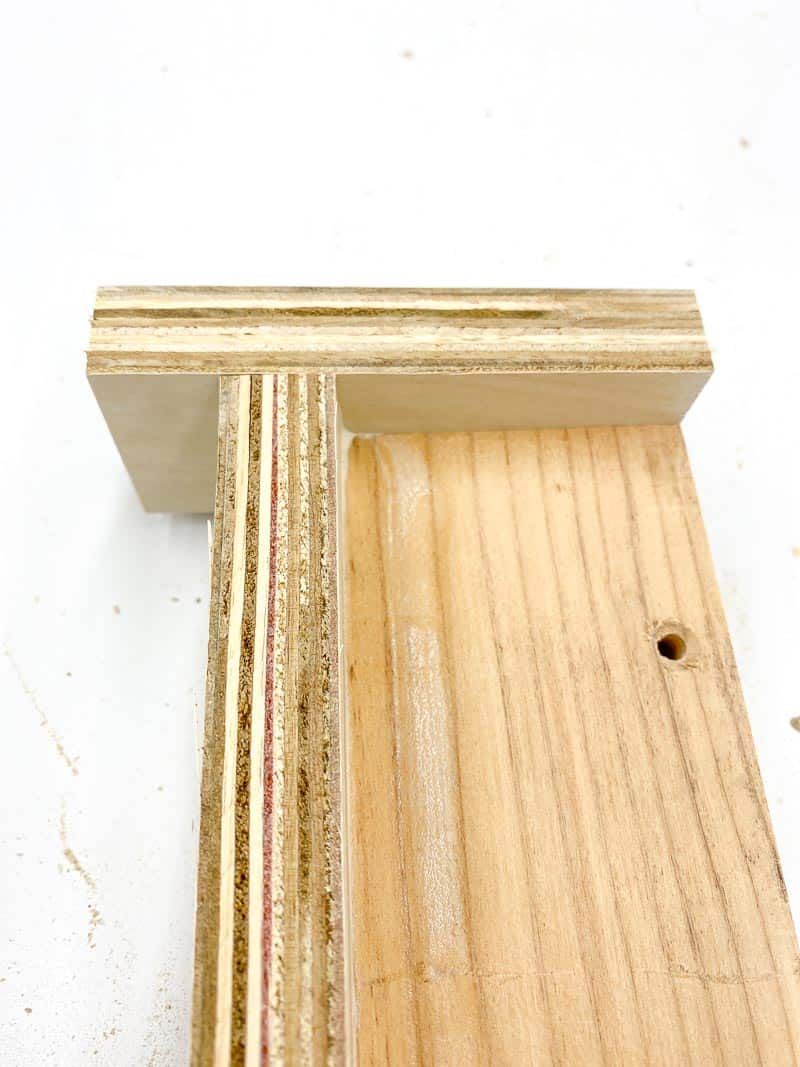
Adhere the 2x4 side of the bracket to the sides of the table saw stand up base (this also gives the saw a trivial more support to prevent the plywood from sagging over time). Then slide the tray into the bracket!
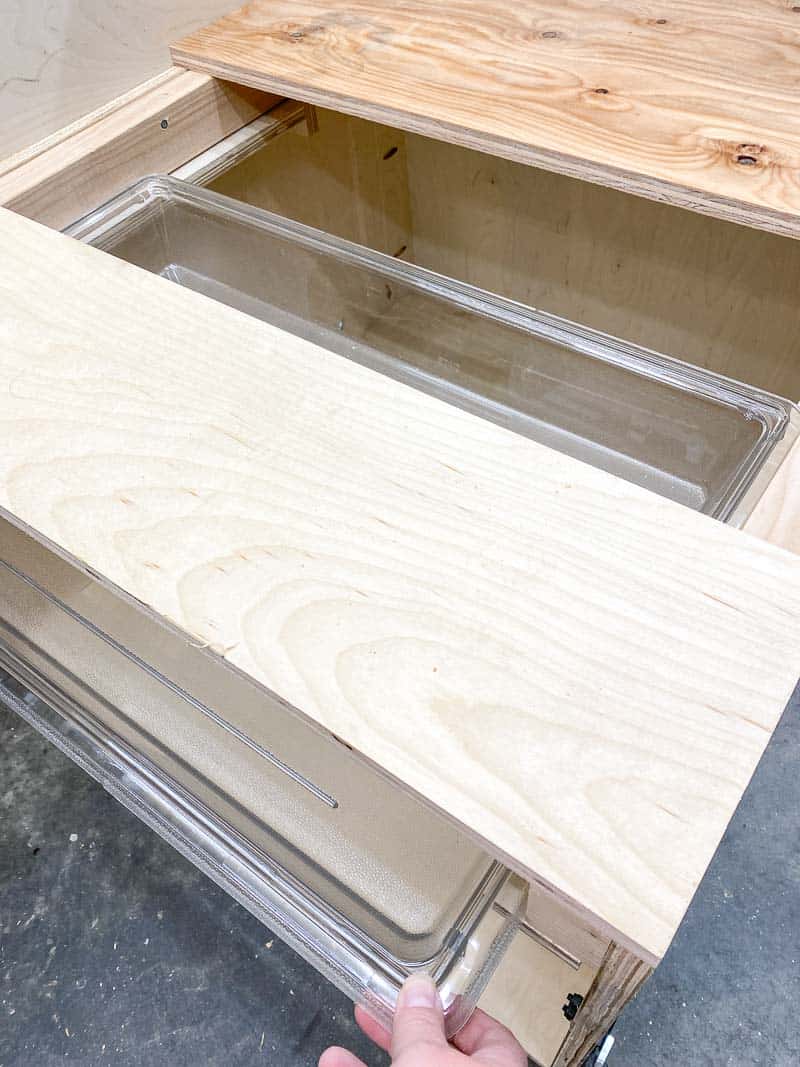
The shelf underneath is supported by two scraps of plywood nailed to the sides. I left it loose so I tin can slide the shelf out to clean information technology or retrieve annihilation that gets pushed too far back.
Add shelves and drawers
Y'all can customize the drawers and shelves to fit your needs, and so I won't become into the specifics too much. I have a full tutorial on how to build drawers 3 different means here if yous're interested in learning more.
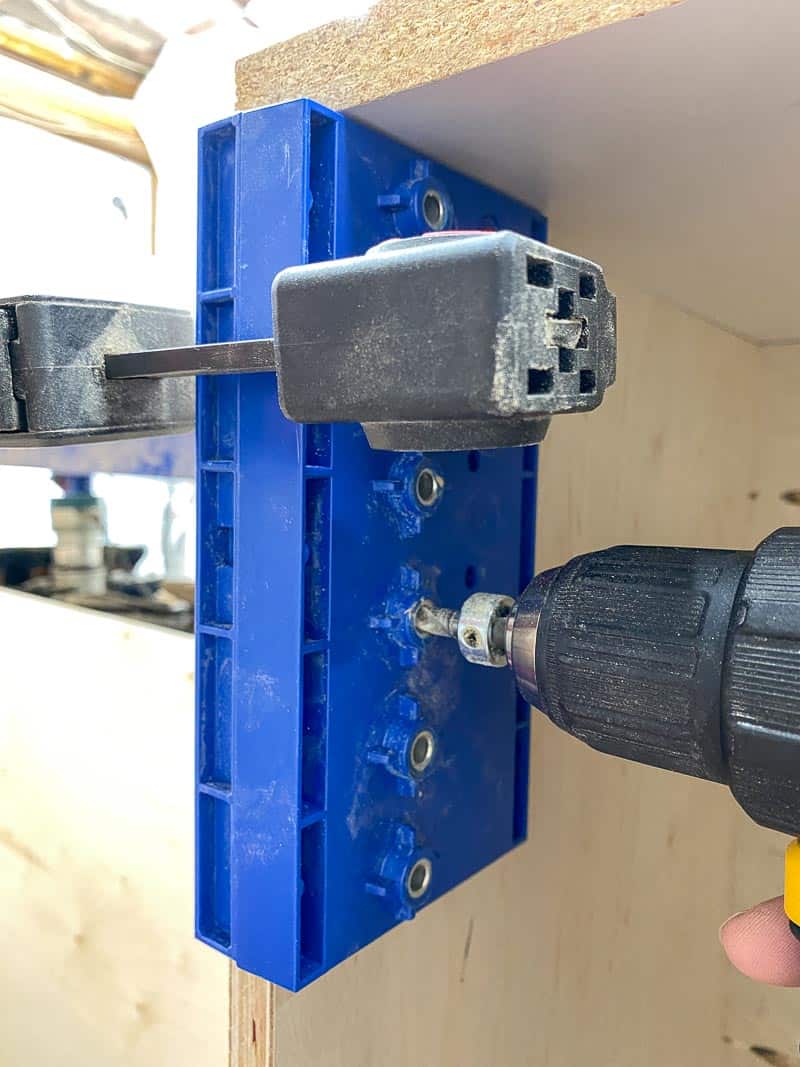
I used a shelf pin jig to drill holes for adjustable shelves first.
I had a leftover bit of OSB from building my garage shelves that ended upward beingness a perfect fit! These bins are bully for keeping similar items together, like my dowel jig and dowels. The width is just right for Festool systainer boxes too!
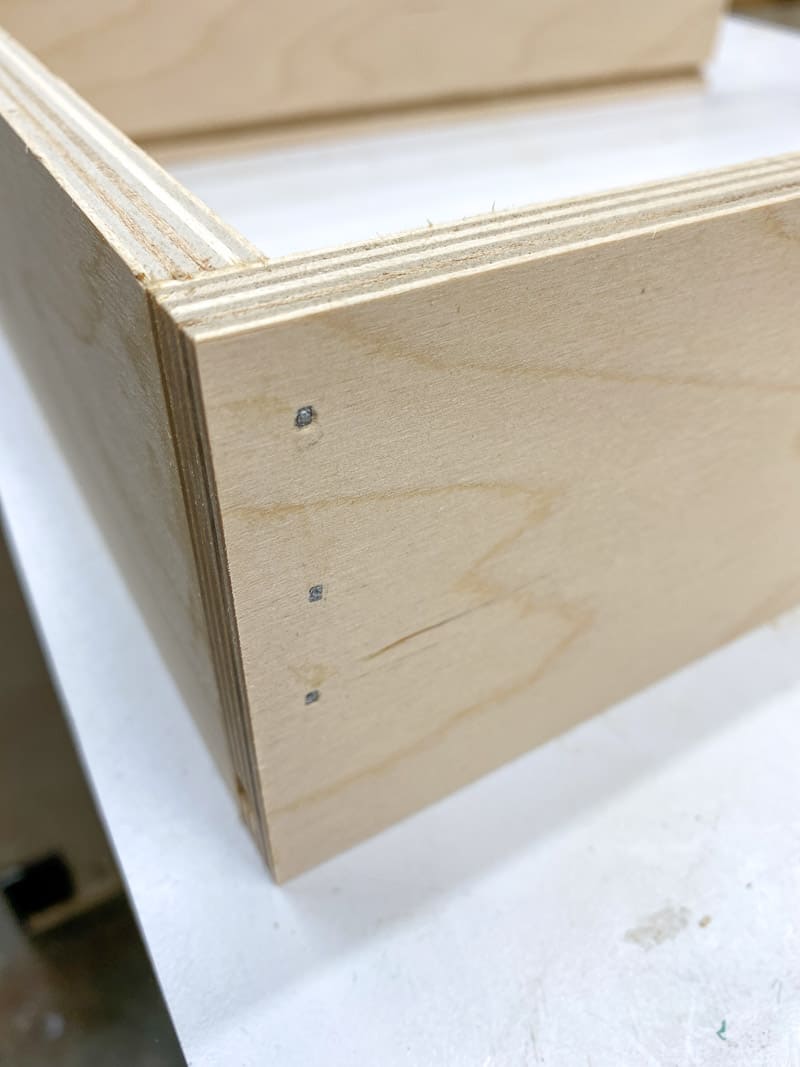
The drawers were made from all the narrow plywood cutoff pieces I proceed in my lumber cart. Some are only three inches deep and some are half-dozen. Some are fabricated with ½" plywood and others are ¾". It's shop furniture, and no one is going to notice but me! I just slapped drawer boxes together with wood glue and brad nails.
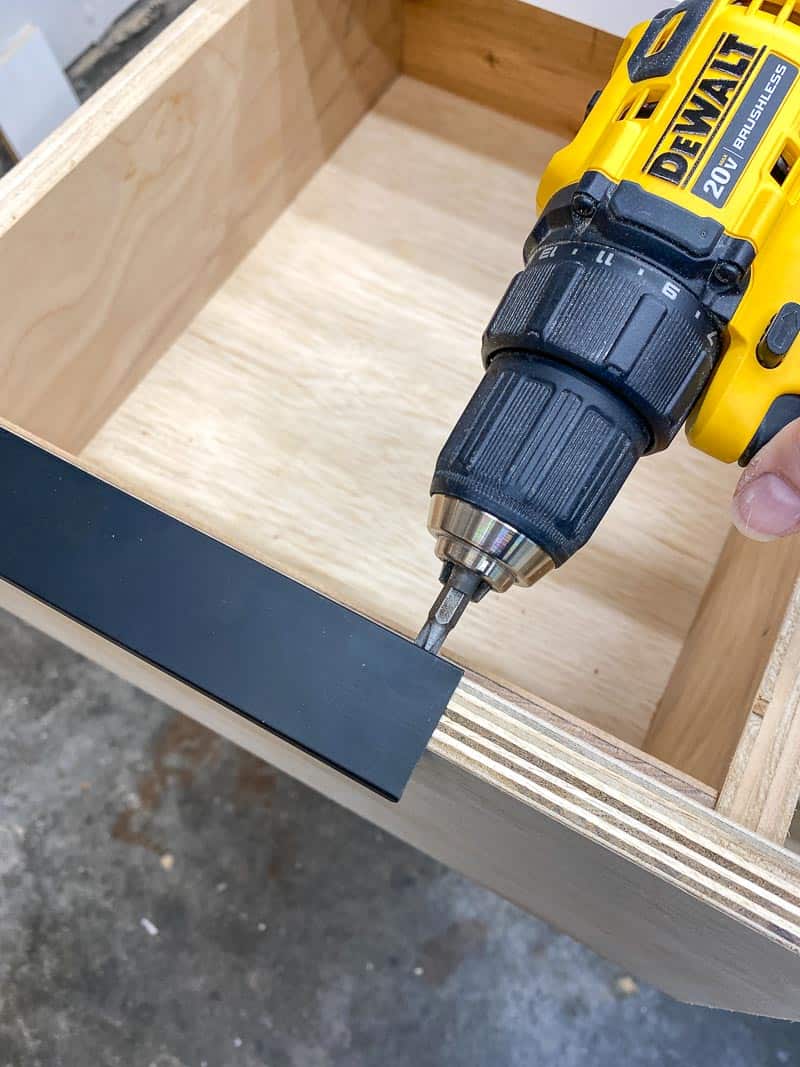
I kept all the drawer fronts the same superlative and width, so they overlay the front edge of the table saw stand. The drawer pulls are super low contour, so I don't hurt myself when I inevitably bump into them while I'm busy working! They merely claw onto the top edge of the drawer front and screw into place from the within.
Enjoy your new table saw table!
My new tabular array saw tabular array has totally changed the functionality of my workshop! I tin can make safer, more accurate cuts with proper support, and I'm more likely to use my table saw for crosscuts instead of the miter saw.
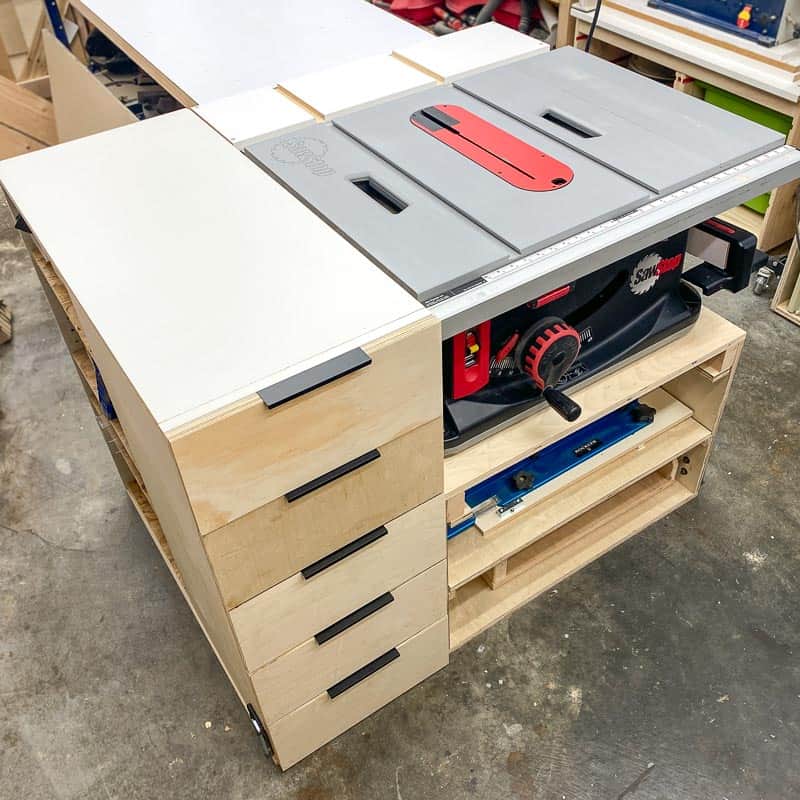
In a small workshop, every inch of infinite counts! I'm loving all the drawers and shelves for smaller items.
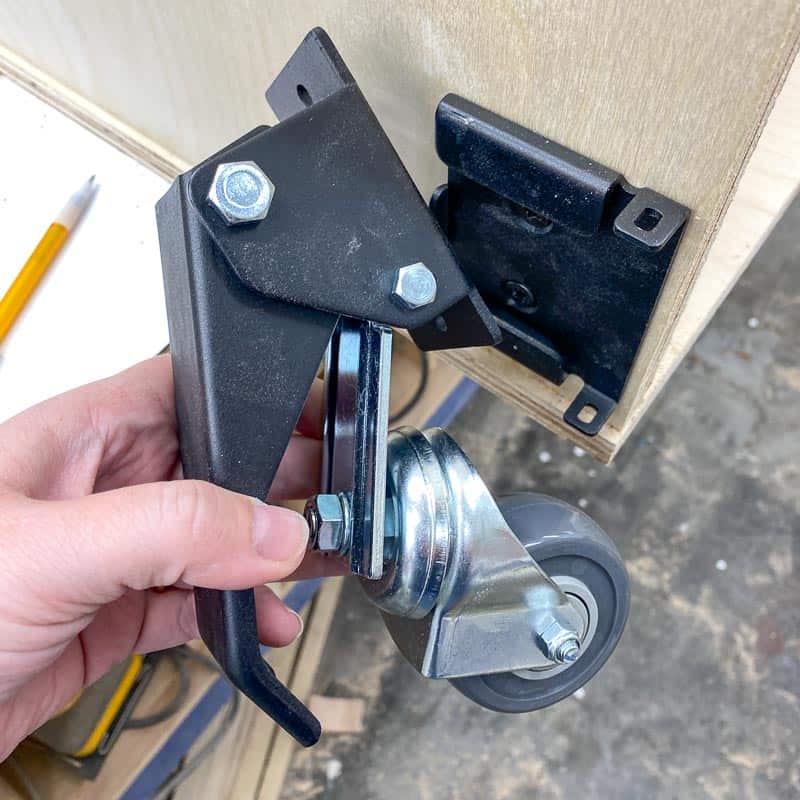
If I ever demand to move the table saw stand up, I can merely slide the casters into these brackets and curl it away!
I can't wait to go started on my next build with this new set up! This is i of those projects that y'all'll wish you had made sooner. Download the plans with all the dimensions, a cut list and plywood cut diagram, and pace by pace instructions past clicking the box below!
Check out these other workshop projects!
Instructions
- Download the plans.
- Measure your tabular array saw.
- Assemble the tabular array saw base.
- Install the top.
- Add dust tray and shelf underneath the saw.
- Add shelves and drawers.
- Enjoy your new table saw table!
Source: https://www.thehandymansdaughter.com/diy-table-saw-stand-plans/